How to resize and watermark images in Photoshop?
I've just transferred photos from my digital camera onto my computer and I want to resize the pictures as they are too big and put a watermark on them as well before I put them on my website. What's an easy way to do this in Adobe Photoshop?
1 Reply

If that's something you would do often, then it's better to record an action (macro) for this purpose so that you can use it effortlessly afterwards. Follow the steps below:
- Start your Photoshop program
- Then open any image you have on your computer
- Locate your Actions palette (if you can't see it, go to the top menu and click on Window -> Actions.
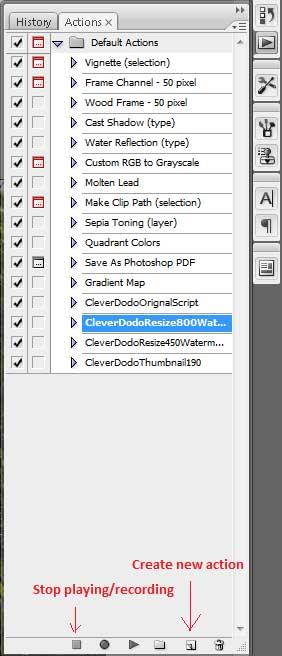
- Click on "Create new action" (see above pic) and give your action a sensible name before clicking on "Record".
- Open your watermark picture
- From the top menu, click Select -> All
- Then Edit -> Copy (or Ctrl+C)
- Minimise the current window so that the previous image is visible.
- Click Image -> Image Size (top menu) and enter your desired resizing values. I usually have a tick next to "Constrain Proportions" so that when I enter the width I would like my image to be, the height is automatically adjusted.
- Now click Edit -> Paste (or Ctrl+V) to drop your watermark onto the image.
- Click on the "Background" layer from your "Layers" palette and from the top menu, choose Select -> All.
- Then click on "Layer 1" (which is your watermark) from the "Layers" palette.
- Now from the top menu, choose Layer -> Align Layers to Selection -> Bottom Edges.
- Repeat the previous step (step 13) and choose Right Edges this time. This will align your watermark nicely to the bottom right corner of your image.
- Now click on File -> Save for Web & Devices and select JPEG High to get a nice picture quality. You can also choose PNG-24 if you wish. Then click Save.
- Now click on File -> Close
- And to finish off recording your action, click on the "Stop playing/recording" button on your Actions palette.
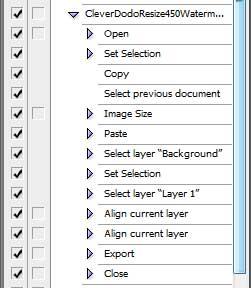
Your actions should look like this:
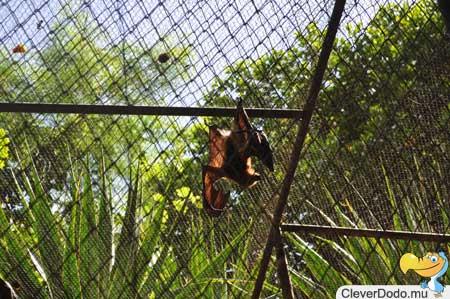
In this tutorial, we have used a watermark picture that was already done before. See the result below:
Running the batch script
To batch resize and watermark, you'll need to click on File -> Automate -> Batch and select your action from the list. Then just choose the folder where your images are located and when you hit OK, your images will be processed.
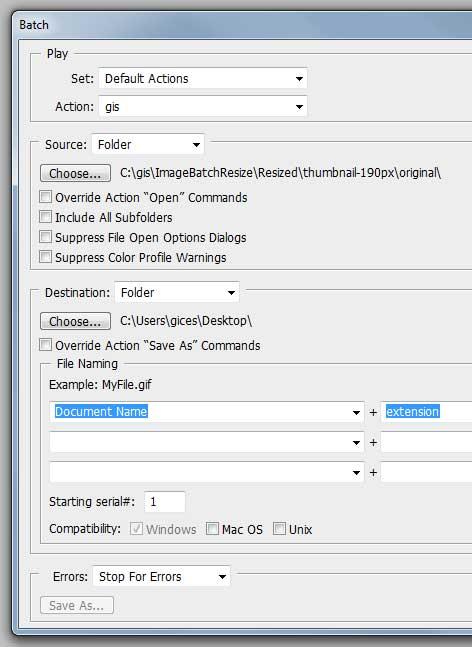
Note that the destination folder will be that which you selected when creating the Photoshop Action. You cannot override it by choosing "Override Action Save As Commands" because the save was done for Web and Devices which is recommended when displaying on websites as EXIF data are omitted and the files are smaller, which makes them load faster.
Hope that helps!
Similar topics for you


The Incubator
This is a place where random discussions occur, some great and some just weird.